Could the message be any clearer? Inspired by my 10 mth old daughter who is already demanding steak and chocolate ganache cupcakes. But not together of course. That would just be weird.
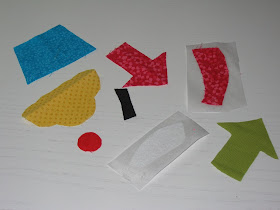
You can click on the image below and print it full page for a pattern of both 'sushi' pieces and 'cupcake' pieces.

Other than that you'll need...
1 terry hand towel
1 already existing bib that you like the size of (for making bib pattern)
1 fat quarter of main fabric
small cutouts of contrasting fabric
Wonder Under or Heat N Bond
velcro or snaps
sewing machine
To start you'll need to create your bib pattern, easiest way to do that is by tracing an outline of a bib you own that you like the size and shape of. Add a 1/2" around the perimeter of the bib for seam allowance, cut out your main fabric according to your new pattern. Next use the pattern above to cut out shapes of whichever bib you're making. Be creative with what kind of prints you use, the more out of the box the better it sometimes comes out!

Next follow the directions of your adhesive paper for all of the applique pieces. (I started off with Heat N Bond and switched to Wonder Under which worked MUCH better) Once you have the backing trimmed lay out the pieces on the main fabric until you get them the way you like. Keep in mind when you're placing them that a 1/2" will be turned under once you sew the bib. In other words things will end up being closer to the edges than they look now. Iron onto main bib front piece according to manufacturer directions.
 Next we'll cut out the terry backing, place your main bib piece face down onto a hand towel and pin into place. Cut around the bib and you'll have an already pinned backing ready to be sewn! (once again, make sure the main bib and terry are right sides together) It should look something like this,
 Sew around the perimeter a 1/4" in leaving a 2" opening for turning. Trim off excess around the seam paying special attention to clip off the excess corners near the top of the bib. This will help those corners to lay down flat when you turn it right side out. Ok, turn it right side out. See what I mean? Now topstitch around the entire bib being sure to fold in the opening you left and stitching it shut.
Almost done! Use a zig zag stitch to go around all of the applique's seams. I know some people like to use translucent quilter's thread so they don't have to keep changing colors but man did that make a big tangled mess when I tried it! So I just changed thread color for each piece. (I left the bobbin white though) You could also do this step right after you iron on the applique but I like to do it last so it goes through both layers of the bib and helps tack it all in place.
 Last step is to either add snaps or sew on velcro for a neck closure. Enjoy!
Just came over from One Pretty Thing- this is the funniest bib I've seen in a long time! My 9-month-old NEEDS a few of these :) (Favorite foods right now are naan, cantaloupe, avocado, strawberries, and pinto beans. Huh?)
ReplyDeleteThanks for sharing!!
OK, Myrnie sent me...our kids are exactly 3 months apart, and she's right - my dude needs one of these. Favorite foods - watermelon, pineapple, yams and chocolate cupdakes.
ReplyDeleteI'm so glad I ran into your blog! Love the sushi bib...can't believe I didn't think of that! WE LOVE sushi!
ReplyDelete